Hi Foodies!
Most people are baffled by the
making of French meringue cookies, French macarons, and soufflés. If
you're knowledgeable in the realm of cooking, you've realized that all
of the aforementioned desserts are made primarily from whipped egg
whites! Now why are people so apprehensive and afraid to cook things
that involve whipped egg whites? As you read on, I'll help to solve the
mystery of egg whites by teaching you some simple, easy tricks to make
sure that you reach stiff peaks every time! And of course, being
The Minimalist Chef, the recipe for
kiwi meringue cookies that will follow the information about egg whites will be using as few ingredients, tools, and time as possible!
An All Inclusive Lesson on Whipping Egg Whites:
Egg
whites. A term that instills fear into even the most learned chefs.
Egg whites are actually quite simple to work with, as long as your know
the proper techniques and make sure that your tools are impeccably
clean. I'm about to walk you through and explicate how to achieve the
different stages of whipped whites. Make sure your learning cap is
securely fastened on your head!
Tools Needed:
- A
stand mixer, a hand mixer, or a manual whisk. Any of these will work,
however the amount of work required increases as you go down the list.
If you have a stand mixer, I highly suggest you use that, as it is the
simplest and easiest to use. I personally use a hand mixer, as I am The
Minimalist Chef, and try to use only a few tools and ingredients at
once!
- A metal bowl (preferably copper), or a plastic
bowl. Make sure that these are IMPECCABLY CLEAN. Any little bit of
protein will inhibit your egg whites from whipping to stiff peaks.
Copper bowls are slightly acidic and help to stabilize the egg whites (I
know, it sounds ridiculous, right? But it actually works, trust me on
this! Just don't leave the whites in the bowl too long, or the bowl
will impart a coppery, metallic flavor on your whites. Who wants
penny-flavored meringues?).
Clean
all your attachments, or your whisk, and separate your egg whites from
your yolks. There are many ways of doing this, but the method that I
prefer the most is to simply crack the shell over your bowl, and move
the yolk from egg shell half to the other. Slowly the egg white will
separate and fall into the bowl. Discard the egg shell and yolk in your
sink. Repeat this process for each egg.
Acidifying the Egg Whites:
Adding
an acid to egg whites before you begin whipping them can keep your
whites from over-whipping and keep them stabilized. A few commonly
used, good acids for egg whites are:
- Cream of tartar (my personal acid of choice)
- A splash of lemon juice
- Whipping in a copper bowl
Personally,
I use cream of tartar to acidify my egg whites. It really don't add
any flavor to the whites, and is super easy to use. Simply take a
teaspoon of it out of the container and dump into your whites; this is
so much easier than squeezing a lemon.
How to Whip Correctly:
To
begin whipping your egg whites, turn your mixer on HIGH speed. Move
the mixer around the bowl, while simultaneously rotating the bowl. Do
this until you reach soft peaks. At this point, if your recipe involves
sugar, begin to add the sugar SLOWLY, a tablespoon at a time. Lower
your mixer to medium speed. Whip until you reach glossy, stiff peaks.
If
using a hand-whisk, follow the same technique as above. However, it
will take an extra 10 minutes or so; it will also be a great workout! I
know that when I've used a hand whisk, my arms are sore the next day.
The Foamy Stage:
The
foamy stage is categorized by small bubbles that form on top of the
whites after they have been whipped for a short period of time, maybe a
minute. Keep whipping!
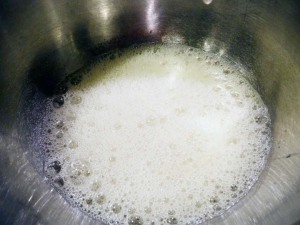
- These are whites that have been whipped for only a minute or two. This is the first stage of whipping. Keep it up!
Soft Peaks:
Soft
peaks are formed after the whites have been whipped for 3-4 minutes.
If you pull your whisk or mixer out of the whites, the "peaks" slowly
fall back down. They are categorized as white, shiny whites that form
peaks that will disappear quickly. These are still not where we want our
egg whites to be at! Keep whisking.

- These are a good example of soft peaks. You can see the small peak slowly falling down.
Stiff Peaks (Perfection!):
Stiff
peaks are EXACTLY where we want our egg whites. Stiff peaks are
extremely glossy and resplendent, and keep their shape indefinitely.
When you take your whisk out of the whites, peaks should form on the
whisk and in the bowl, and look almost like soft-serve ice cream. They
are stiff and perfect for everything that require whipped egg whites. STOP HERE! Do not over-beat your whites. I repeat, STOP HERE! These whites are PERFECT, and you definitely do not want to over-beat your egg whites.
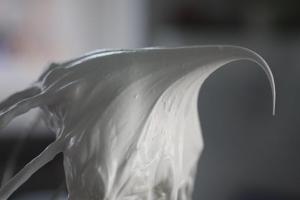
- These
whites are at the perfect consistency. They are at "stiff peaks." The
whites are glossy, white, and hold their shape forever.
What Next?
Now
that you've whipped your whites to stiff peaks, they're ready for any
recipe! If you're incorporating them into a French macaron, you're
probably going to want to "fold" in your whites to the dry mixture.
Folding egg whites into a dry mixture or another ingredient allows the
whites to retain maximum air trapped inside. This keeps the egg whites
stiff and shiny.
How do I fold?
Folding is actually quite simple. To fold, grab your silicon spatula
and slowly bring it around the circumference of the bowl, then kind of
dump the gathered whites on top of the egg white pile in the center.
Repeat this process, turning the bowl each time to combine the whites
with the dry mixture. This will allow for maximum air retention.

- This picture excellently shows the progression of folding whites into a batter.
I
hope that this post has really helped to resolve the enigma that are
egg whites. Many people are so afraid to cook with them, but they're
really not that hard to use!
Okay, now what? Is there a recipe that I can use to test my new-found abilities?
Yes!
I have prepared for all of you foodies a blissful kiwi meringue cookie
recipe. This recipe is SIMPLE and fast (aside from the 2 hours of
baking!).
Kiwi Meringues:
INGREDIENTS:
- 3 Egg Whites, separated from the yolks
- 1 tbsp Cream of Tartar
- The juice and pulp of one kiwi, mashed
- 1 Cup superfine white sugar (also known as castor's sugar)
- A baking sheet lined with parchment
- A plastic bag
Procedure:
- Preheat
your oven to 225 degrees. Separate your egg whites into a bowl,
preferably copper if you have. Make sure the bowl is CLEAN! If there
is even a speck of protein or yolk, the whites won't form stiff peaks.
- Add your tablespoon of cream of tartar to the whites.
- Whip
your egg whites to soft peaks. At this point, add your superfine sugar
1 tablespoon at a time. This keeps the whites from collapsing.
- Once
at stiff peaks, add in the juice and mashed pulp of 1 kiwi SLOWLY. I
put mine in one tablespoon at a time to prevent the whites from
collapsing. The egg whites are EXTREMELY delicate at this point, and
one mistake can be the end of the whites.
- Open the plastic bag
and position it over a tall glass. Slowly spoon your meringue mixture
into the bag towards one corner, being careful not to break the
stiffness of the whites. Cut one corner of the bag and slowly pipe the
meringues out onto your parchment paper, about a half-dollar in size,
half an inch apart.
- Bake for 2 hours and 15 minutes, or until a
meringue doesn't stick to the parchment and comes off cleanly. The
middle should be delicate, with some chewiness. The outside should be
crunchy but still bite-able.

- Our 3 beautiful eggs.
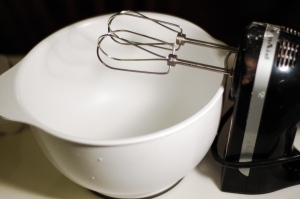
- Clean bowl + mixer.

- Prepped superfine white sugar.

- Kiwi ready to be juiced.
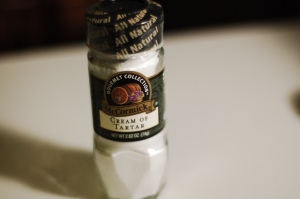
- Our acid.
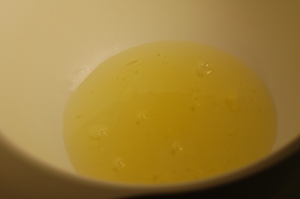
- The whites after they have been separated.

- Cream of tartar about to be added to the whites.

- At soft peaks!

- Adding the sugar SLOWLY.

- After the last addition of sugar, we have stiff peaks! Perfecto! C'est magnifique!
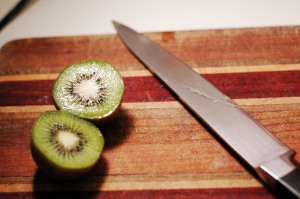

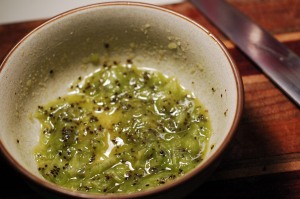
- Mashed and juiced.

- The plastic bag used to pipe!

- Beautiful!!


